
The centerpiece of any grand holiday feast, a perfectly roasted turkey, deserves an equally grand presentation. Yet, for many home cooks, the thought of how to carve a turkey can be daunting, especially with an eager audience of family and friends watching. Fear not! This guide will transform you into a carving connoisseur, making the process smooth, satisfying, and even enjoyable.
Why Proper Turkey Carving Matters
Beyond the impressive visual, proper carving ensures every guest gets a delicious, evenly sliced piece of meat. It also maximizes the yield from your bird and makes serving effortless. As Michael Handal, a distinguished chef at the Institute of Culinary Education’s New York City campus, notes, carving at the head of the table is a cherished tradition, but it doesn’t have to be a high-pressure performance.
Essential Prep: Setting the Stage for Success
1. Let Your Turkey Rest (The Golden Rule!)
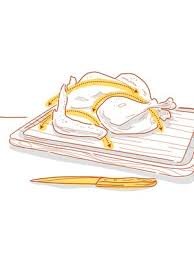
This is arguably the most crucial step! After removing your turkey from the oven, resist the urge to immediately begin carving. Instead, transfer it to a large cutting board and allow it to rest, uncovered, for at least 20 to 30 minutes, or even up to an hour for larger birds. This resting period allows the juices to redistribute throughout the meat, resulting in a more tender, flavorful, and easier-to-carve turkey. Cutting too soon will cause all those delicious juices to spill out, leaving you with dry meat.
2. Gather Your Arsenal: The Right Tools
Just like any skilled artisan, a turkey carver needs the right equipment. Forget struggling with a dull chef’s knife; investing in a dedicated carving set makes all the difference.
- Sharp Carving Knife: An 8- to 10-inch carving knife is ideal. Its long, thin blade allows for clean, precise cuts. Chef Handal emphasizes that smaller knives can lead to jagged, irregular slices, diminishing your hard work.
- Sturdy Carving Fork: This two-pronged fork helps stabilize the turkey while you carve, preventing slips and ensuring safety.
- Large Cutting Board: Opt for a board with a channel or well around the edge to catch any delicious juices that might escape.
- Sharpening Steel: A quick touch-up before you start ensures your knife is razor-sharp.
3. Clear the Path: Remove Obstacles
For an even smoother carving experience, consider removing a few items before you begin:
- Wishbone: Removing the wishbone before cooking makes it much easier to slice the breast meat later.
- Stuffing/Trussing: If your turkey was stuffed or trussed, remove these once the bird has rested.
Step-by-Step Guide: How to Carve a Turkey Effortlessly
Now that your turkey is rested and your tools are ready, let’s dive into the carving process. Remember, confidence and even strokes are key!
1. Remove the Legs and Thighs
- Place the turkey breast-side up on your cutting board.
- Locate where the leg meets the body. Using your carving knife, slice through the skin and meat, gently pulling the leg away from the body until the thigh bone pops out of its socket.
- Cut through the joint, separating the entire leg and thigh unit from the turkey. Repeat on the other side.
- Separate the drumstick from the thigh by cutting through the joint that connects them.
2. Slice the Breast Meat
- Find the breastbone (keel bone) running down the center of the turkey.
- Make a long, horizontal cut across the bottom of one breast, parallel to the cutting board, going down to the bone. This creates a base for your slices.
- Starting from the top of the breast, near the breastbone, make thin, even vertical slices downwards, following the curve of the rib cage, until you meet your horizontal cut.
- Gently pull the slices away and arrange them on a platter. Repeat for the other breast.
3. Carve the Wings
The wings can be removed at their joint, similar to the legs. They are often served whole or can be disjointed into smaller pieces.
After the Feast: Making the Most of Your Turkey
Don’t let any part of your magnificent bird go to waste! The carcass and drippings are culinary gold.
Transform the Carcass into Stock
The best way to honor your turkey is to turn its carcass into a rich, flavorful stock or broth. Simply place the leftover bones, skin, and any remaining bits of meat in a large pot with vegetables like carrots, celery, and onions. Cover with water and simmer for several hours. This homemade stock is perfect for soups, gravies, or risottos. For more detailed instructions on making stock, consider resources from reputable culinary sites like Food Network.
Proper Disposal of Leftovers
If making stock isn’t feasible, dispose of the carcass responsibly. Check with your local waste management program; some allow composting of meat bones. Otherwise, place it in regular trash. Crucially, avoid putting poultry skin, bones, or grease down your garbage disposal. These can cause severe clogs and damage your appliance. Always collect grease and drippings in a disposable container and allow them to solidify before throwing them in the trash, as advised by organizations like the EPA.
Conclusion: Carve with Confidence!
With these straightforward steps and a few expert insights, how to carve a turkey will no longer be a source of stress but a moment of pride. Embrace the tradition, enjoy the process, and delight your guests with beautifully carved, succulent turkey every time!